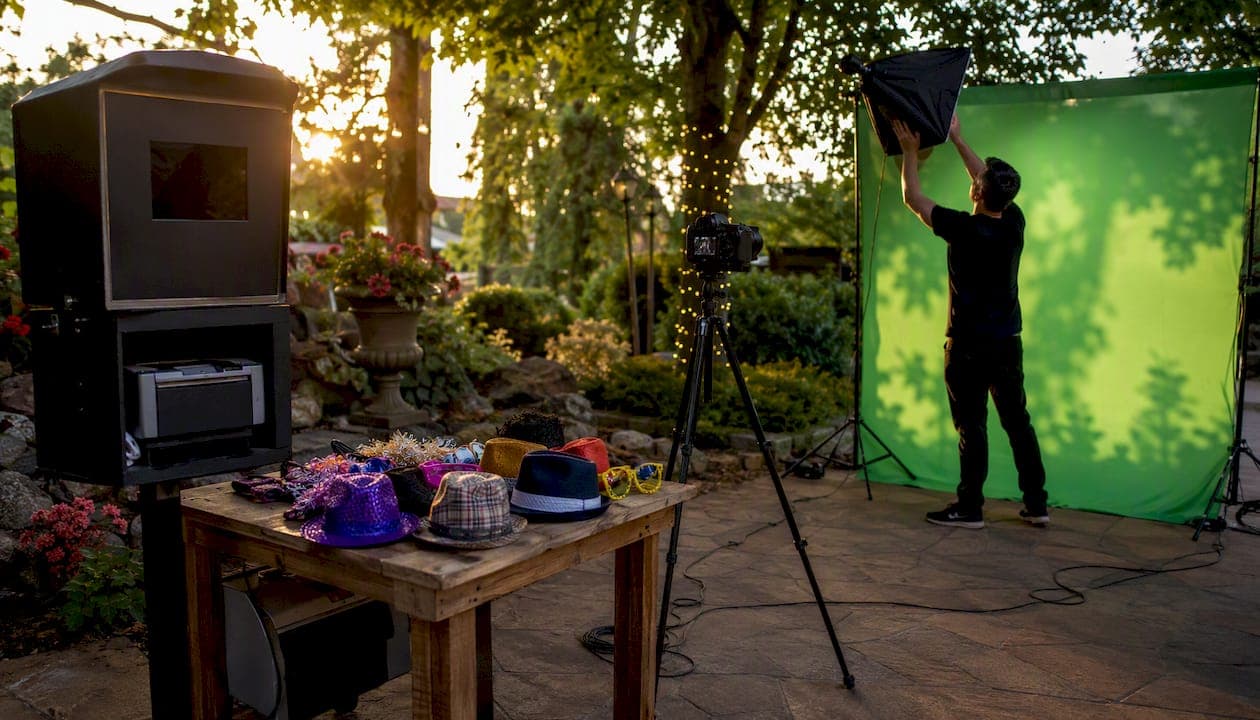
A green screen photo booth is worth it for almost every event type, and for most planners the fastest path to a great result is hiring a vendor with a complete rig rather than assembling one from scratch. That said, small parties and budget-conscious organizers can pull off a clean setup with the right software and a few hundred dollars in gear.
Two fastest paths, at a glance:
- DIY or hybrid: Works for low-volume gatherings, school events, or planners who want to own the workflow. Apps like Simple Booth on an iPad can handle capture, live preview, and SMS delivery in one place.
- AI vs. green screen: BoothLedger's analysis notes that modern AI background removal handles roughly 95% of typical event shots, but green screen still outperforms AI for flyaway hair and very large group shots.
Key Takeaways
A green screen photo booth delivers the most value when the lighting, software, and throughput planning are locked in before guests arrive, not during the event.
| Point | Details |
|---|---|
| Hire vs. DIY threshold | Hire a staffed vendor for events over 75–100 guests or any event with brand deliverables. |
| Lighting is the critical variable | Keep subjects 3–5 feet from the backdrop and light the screen independently to avoid color spill. |
| Software defines the workflow | Green Screen Wizard suits Windows-based setups; Simple Booth handles iPad-based mobile workflows. |
| Vendor inclusions to verify | Confirm staffing, insurance, setup time outside rental hours, and branding approval in writing. |
| Fiesta Fusion for Northern Utah | Fiesta Fusion provides staffed green screen rentals with custom backgrounds, prints, and digital delivery across Weber, Davis, and Salt Lake counties. |
Table of Contents
- What does a green screen photo booth actually do?
- What gear does a reliable green screen booth need?
- How do you light a green screen booth to get clean edges?
- Which software options work best for green screen photo booths?
- How do you set up and test a green screen booth before guests arrive?
- How much does a green screen photo booth rental cost?
- Should you hire a pro or build a DIY green screen setup?
- What outputs do guests actually receive, and how do they share them?
- A Fiesta Fusion green screen activation in practice
- What event operators wish planners knew before event day
- Fiesta Fusion brings the full green screen experience to Northern Utah
- Sources
- FAQ
What does a green screen photo booth actually do?
Chroma keying is the underlying technology: software detects a specific color (almost always green) in the camera frame and replaces it with any digital image or video you choose. The result is a composite photo where guests appear to stand in Paris, on a branded stage set, or in front of a custom logo wall, delivered in seconds.
Event planners choose green screen over a static printed backdrop because the background can change between shots, which means one booth can serve a morning awards breakfast and an evening gala with completely different looks. Corporate teams use it for brand activations that drive measurable social sharing. Wedding couples get a custom scene that matches their theme. School dances, quinceañeras, fundraisers, and trade shows all benefit from the flexibility.
What gear does a reliable green screen booth need?
A vendor proposal or DIY kit should cover every item below. Missing even one can kill output quality on event day.
Backdrop and structure:
- Fabric muslin (wrinkle-prone but packable), collapsible pop-up (fastest setup), paper seamless (sharpest color, tears easily), or painted wall (permanent installs only)
- Adjustable backdrop stand with crossbar and sandbag weights
- Minimum 8x8 ft backdrop for solo and couple shots; 10x12 ft or wider for groups
Lighting:
- Two to four softbox or LED panel lights for the backdrop, positioned to flood it evenly
- Separate key light and fill light for subjects
- Light stands, boom arms if needed, and gaffer tape
Camera and capture:
- DSLR or mirrorless camera (Canon EOS series, Sony Alpha series, or equivalent) on a sturdy tripod
- Tethering cable or wireless trigger to the host computer
Computing and software:
- Laptop or iPad running chroma key software
- Printer (dye-sublimation for instant 4x6 prints) with enough media for the expected guest count
- Cabling, power strip, and a UPS battery backup
Guest experience:
- Props box with themed items (see photo booth prop ideas for inspiration)
- Attendant station with a monitor showing the live composited preview
Transport:
- Flight cases or padded rolling bags for every fragile component; Foto ATM's setup guide is a useful reference for load-in planning
Pro Tip: Ask your vendor how many flight cases the rig ships in and whether they carry a spare camera body. A single-camera setup with no backup is a single point of failure for a four-hour event.
How do you light a green screen booth to get clean edges?
Lighting is where most DIY setups fall apart, and where experienced operators earn their fee. The core principle is separation: the lights hitting the backdrop and the lights hitting your subjects must be independent circuits pointed at different planes.
Snappic's setup guide recommends keeping subjects three to five feet from the green screen and lighting the background separately to avoid color spill. Color spill is the green tint that bleeds onto a subject's shoulders or hair when they stand too close to a lit backdrop, and it is the most common reason composites look fake.
| Parameter | Recommended setting | Common mistake |
|---|---|---|
| Subject-to-screen distance | 3–5 feet minimum | Subject touching or leaning on backdrop |
| Background light placement | Two lights at 45° angles, even flood | Single light creating hot spots |
| Subject key light | Softbox at 45°, slightly above eye level | Bare bulb creating harsh shadows |
| Camera aperture | f/8 for depth and sharpness | Wide open blurring backdrop unevenly |
| Shutter speed | 1/100–1/200 sec to freeze motion | Too slow, causing motion blur in composites |
| ISO | 100–400 to minimize noise | High ISO adding grain that confuses keying software |
| White balance | Manually set to match your key light | Auto WB shifting between shots |
| Color temperature consistency | All lights same Kelvin rating | Mixing tungsten and daylight sources |
Mixed color temperatures are the second most common problem after spill. If your backdrop lights are 3200K tungsten and your subject lights are 5600K daylight, the software sees two different color casts and struggles to key cleanly.
Which software options work best for green screen photo booths?
The software is what turns a camera and a green cloth into a working photo booth, and the feature gap between options is significant.
Green Screen Wizard runs on Windows and Mac and is built specifically for photobooth workflows. Its live compositing engine processes each frame in real time so guests see the finished composite on a preview monitor before the shutter fires. The background library approach lets operators pre-load dozens of scenes and switch between them without touching the camera settings. It also handles printing integration directly, which removes a common bottleneck.
Simple Booth takes a different angle: it runs on iPad and combines capture, template selection, and SMS or email delivery in a single app. For small events where a laptop and printer setup feels like overkill, Simple Booth removes a lot of friction. The tradeoff is that iPad-based workflows have less raw processing power for complex composites and typically require a separate printer connection.
Platform compatibility matters. Green Screen Wizard is Windows-first with a Mac version available. Simple Booth is iOS only. If your venue's house computer runs Windows and your vendor's software is Mac-only, that is a problem worth surfacing before event day.
Background sources and design tools:
- Pexels offers free photos and short video clips suitable as animated overlays or static backgrounds
- Unsplash provides high-resolution images that hold up at large print sizes
- Pixabay adds another free library with video assets
- Canva is the fastest tool for building branded backgrounds and print templates; its drag-and-drop layout editor means a planner can produce an on-brand 4x6 template in under an hour without a designer
- Affinity Photo handles final color tuning and print-ready artwork for planners who need pixel-level control
Free libraries work well for non-branded events. Corporate activations almost always need custom backgrounds with pre-approved artwork, and Canva is where most planners start that process.
How do you set up and test a green screen booth before guests arrive?
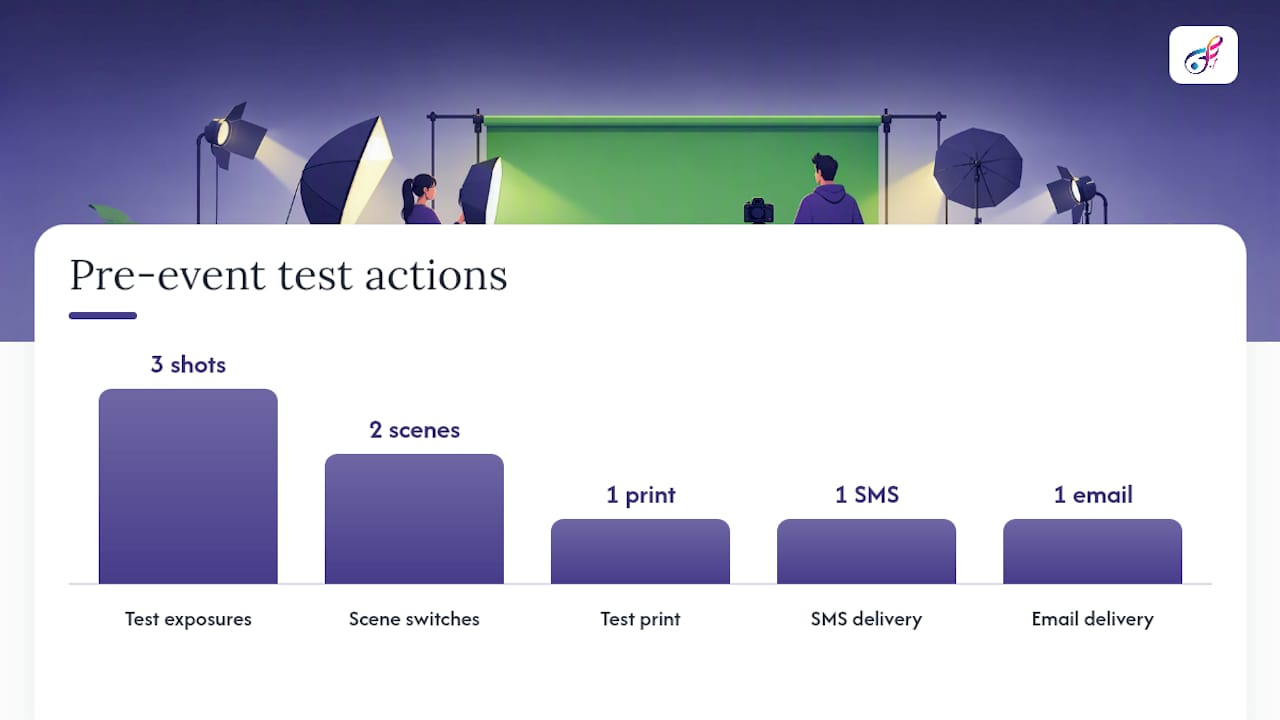
A setup that has not been tested is a setup that will fail in front of guests. Run through this sequence on every event.
Setup sequence:
- Measure and mark the footprint: backdrop, subject zone, camera position, and attendant station. Allow at least 12 feet of depth and 10 feet of width for a standard two-person setup.
- Build the backdrop frame and hang or clip the green material. Pull it taut; wrinkles create shadows that confuse keying software.
- Place and level background lights. Power them on and check for hot spots by photographing the bare backdrop before subjects enter the frame.
- Set up the camera on the tripod at subject chest height. Connect the tether cable or wireless trigger to the host computer.
- Launch the chroma key software and load your background library. Confirm the software sees the camera feed.
- Set aperture, shutter speed, ISO, and white balance manually. Lock them. Do not leave any setting on auto.
- Warm up the printer and run one test print to confirm color calibration and paper feed.
- Place props, signage, and the guest-facing preview monitor.
- Run a safety check: secure all cables with gaffer tape, confirm sandbags are on every stand base, verify the power strip is not a trip hazard.
Test-shot checklist (run before doors open):
- Take three test exposures with a stand-in subject at the front, middle, and back of the subject zone.
- Inspect composite edges on the preview monitor. Look for green fringing, spill on shoulders, and hair detail. Adjust background light intensity if needed. Snappic's guide is a useful reference for edge troubleshooting.
- Confirm the background switches correctly between at least two scenes.
- Print one test photo and check color accuracy and crop.
- Send one test image via SMS and one via email to confirm delivery workflows.
- Walk the guest flow from entrance to photo to print pickup. Time it. A well-tuned booth should move one group through in 60–90 seconds.
Sharing flow checklist:
- SMS and email templates loaded and tested
- QR code printed and posted at the exit point
- Hashtag or branded overlay approved by the client
- Gallery link confirmed and accessible on mobile
How much does a green screen photo booth rental cost?
Price depends on five variables: event duration, staffing level, printer type and media volume, custom background design, and travel distance. Rush setup fees and add-ons like video compositing or a 360 video booth layer on top.
A realistic way to think about tiers:
Entry level ($400–$700): Unstaffed or lightly staffed, basic software, digital delivery only, no custom backgrounds. Works for small parties where guests are comfortable running the booth themselves.
Mid-range ($800–$1,500): Staffed attendant, dye-sub printer for instant prints, custom background design included, SMS and email delivery, branded overlay. This covers most weddings and corporate holiday parties.
Premium ($1,500–$3,000+): Full production setup with multiple print stations, video compositing, GIF and boomerang outputs, on-site branding approval, dedicated technician, and insurance documentation. Standard for trade shows and large brand activations.
For Northern Utah pricing context, the Ogden photo booth rental cost guide breaks down what local packages typically include at each tier.
Vendor inclusions checklist — ask for these in writing:
- Staffed attendant for the full event duration
- Setup and teardown time (not counted against your rental hours)
- Printer, paper, and ink for the quoted guest count
- Proof prints and branding approval before the event
- Certificate of insurance naming your venue
- Deposit amount, cancellation terms, and rescheduling policy
Should you hire a pro or build a DIY green screen setup?
The honest answer depends on guest volume and how much the output quality matters to your audience.
Hire a vendor when:
- Guest count exceeds 75–100 people (throughput becomes a logistics problem, not a tech problem)
- The event has brand deliverables: logos, custom overlays, pre-approved artwork
- The venue has unusual power, space, or lighting constraints a vendor has seen before
- You need prints on site, not just digital files
- Your schedule has no buffer for a 45-minute troubleshooting session
DIY or hybrid when:
- Guest count is under 50 and digital delivery is sufficient
- Budget is under $500 and you have time to test the setup in advance
- The event is informal and guests will tolerate a slightly slower flow
Questions to ask every prospective vendor:
- How long does your setup take, and is that included in the rental hours?
- What is your throughput per hour with prints?
- Can I see sample outputs from a similar event type?
- Do you carry a backup camera body and printer?
- What is your cancellation and rescheduling policy, and do you carry event insurance?
- Who approves the branded overlay and background artwork, and what is the turnaround?
Red flags: a vendor who cannot show sample outputs, quotes setup time inside your rental window, or cannot provide a certificate of insurance. Photo booth popularity data shows that guest engagement drops sharply when wait times exceed three minutes per group, so throughput capacity is not a minor detail.
What outputs do guests actually receive, and how do they share them?
The output menu has expanded well beyond the 4x6 print, and planners should specify exactly what they want before signing a contract.
Common output formats:
- Instant 4x6 prints or 2x6 photo strips from a dye-sublimation printer
- Digital files delivered via SMS or email within seconds of the shot
- Animated GIFs assembled from a burst of three to five frames
- Boomerang-style short videos
- Branded overlays and watermarks applied automatically at capture
Guest flow by event type:
At a wedding with 150 guests, a single staffed booth with one printer typically handles 80–100 sessions over a four-hour window, producing roughly 160–200 prints if most guests take two copies. The attendant manages the queue and keeps sessions moving.
At a corporate trade show booth, the priority shifts to digital delivery and social sharing over prints. A live composited preview monitor visible from the aisle draws foot traffic, and SMS delivery means guests walk away with a branded image in their pocket before they reach the next booth.
Small parties under 50 guests run more casually. A single iPad running Simple Booth with SMS delivery and no printer is often enough, and the informal pace actually increases dwell time because guests experiment with backgrounds.
On-site sharing best practices:
- Post the QR code at eye level at the exit, not buried on a table
- Use a short, memorable SMS gallery link rather than a long URL
- Place the hashtag on a prop sign inside the frame so it appears in every photo
- For corporate events, confirm the branded overlay is approved at least 48 hours before the event so there is time to revise it
Photo booth gallery workflows explain how post-event download galleries work for planners who want to share a full image set with clients after the event.
A Fiesta Fusion green screen activation in practice
At a recent corporate event in Weber County, Fiesta Fusion deployed a staffed green screen photo booth for a 200-guest company celebration. Setup took approximately 90 minutes before doors opened, covering backdrop build, lighting calibration, software configuration, and a full test-shot sequence.
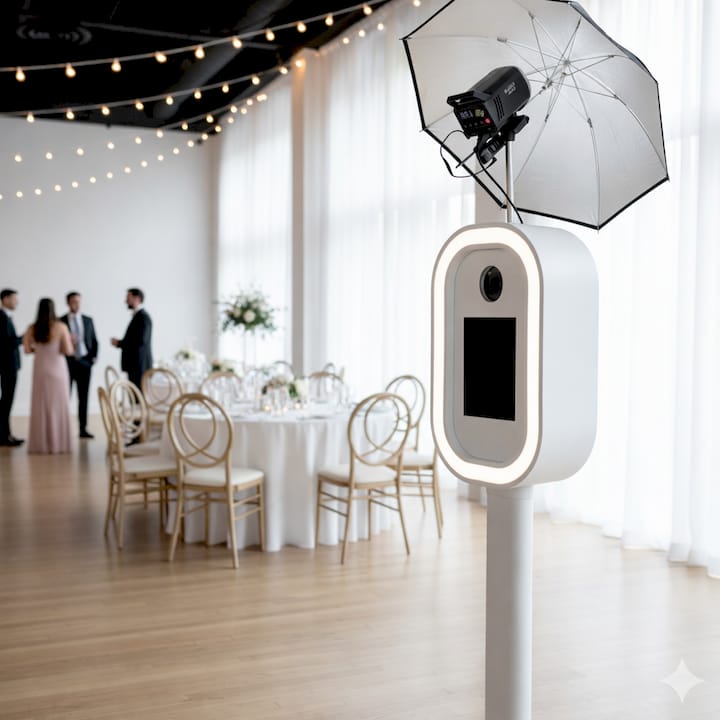
Over a four-hour event window, the booth produced prints for roughly 120 guest groups, with digital files delivered via SMS to each participant. The client had pre-approved two custom backgrounds: a branded scene with the company logo and a themed backdrop matching the event's visual identity. Both loaded into the background library before setup was complete, so the attendant could switch scenes between groups without interrupting the flow.
Social sharing was tracked through a branded hashtag embedded in the overlay. The client reported strong on-site engagement, with guests returning for second sessions after seeing the live preview monitor from across the room.
Planners interested in sample outputs or a portfolio review can request them directly through Fiesta Fusion's booking page.
What event operators wish planners knew before event day
The problems that derail green screen booths on event day almost never come from the technology. They come from the venue.
The practical fix for all three is a site visit or a detailed venue questionnaire completed at least two weeks before the event. Confirm the distance from the nearest 20-amp circuit to the planned booth location, ask whether the venue uses fluorescent or LED overhead lighting (and whether it can be dimmed or redirected), and get the expected arrival curve from the client so you can staff and print accordingly.
One operator-vetted tip: bring a 50-foot heavy-duty extension cord and a separate power strip rated for the printer's draw. Printers pull more current than most planners expect, and sharing a circuit with a DJ rig or catering equipment is a reliable way to trip a breaker mid-event.
Fiesta Fusion brings the full green screen experience to Northern Utah
Fiesta Fusion is a veteran-owned photo booth and DJ company serving Ogden, Weber County, Davis County, and Salt Lake City. For green screen activations, the standard package includes a staffed attendant, professional lighting rig, custom background design, instant dye-sublimation prints, and SMS and email digital delivery. Every booking includes setup and teardown time outside your rental window, a certificate of insurance for your venue, and a pre-event branding approval process so your overlays and backgrounds are confirmed before the day arrives.
For events that call for something beyond a standard booth, Fiesta Fusion also offers a 360 video booth and a full menu of event enhancements including uplighting, cold spark fountains, and custom backdrops. To check availability for your event date and get a quote, visit Fiestafusion or reach out directly through the booking form.
Sources
- The ultimate green screen set up
- AI Background Removal vs Green Screen: Which Is Better for Photo Booths in 2026? | BoothLedger
- Green Screen Tech: Setup Guide for Photo Booths - Foto ATM
- Green Screen Photo Booth Software
- Simple Booth on the App Store
- Canva
- Pexels
- Green Screen Photo Booth Ideas That Actually Drive Brand Engagement at Corporate Events
FAQ
What is a green screen photo booth?
A green screen photo booth uses chroma key technology to replace a solid-colored backdrop with any digital image or video, producing a composite photo where guests appear in a custom scene. The result is delivered instantly as a print, digital file, GIF, or video.
How do you get green screen working on a Mac photo booth setup?
Green Screen Wizard offers a Mac-compatible version, and Simple Booth runs on iPad. Connect your camera via USB tether or use a wireless trigger, launch the software, and manually set white balance and exposure before the event to prevent the software from losing its key between shots.
What is the average cost for a photo booth rental?
Staffed green screen photo booth rentals in the United States typically run $400–$700 for basic digital-only setups, $800–$1,500 for staffed packages with instant prints and custom backgrounds, and $1,500–$3,000 or more for full production setups at trade shows or large brand activations.
Can you add a custom background to a photo booth?
Yes. Most chroma key software, including Green Screen Wizard and Simple Booth, lets operators pre-load a library of custom backgrounds that switch between sessions. For corporate events, Fiesta Fusion includes a pre-event branding approval step so custom backgrounds and overlays are confirmed before the event day.
When does green screen outperform AI background removal?
BoothLedger's analysis finds that AI handles roughly 95% of typical event shots cleanly, but green screen still wins for fine hair detail and very large group shots where AI edge detection struggles with overlapping subjects.