
TL;DR:
- Effective event planning treats the event as a fixed-date project, working backward through a structured timeline.
- Vendors should be coordinated with clear communication, multiple quotes, and a designated point of contact to ensure smooth execution.
Event planning is the process of organizing all details and logistics needed to create a successful, memorable event. Whether you are planning a wedding in Weber County, a quinceañera in Salt Lake City, or a corporate gathering in Ogden, understanding how event planning works gives you a real advantage. The event planning industry is projected to grow 8% through 2032, which reflects how much demand exists for well-organized, professionally executed events. The core principle is simple: treat your event like a project with a fixed deadline, then work backward from that date to hit every milestone on time.
What are the main stages of the event planning process?
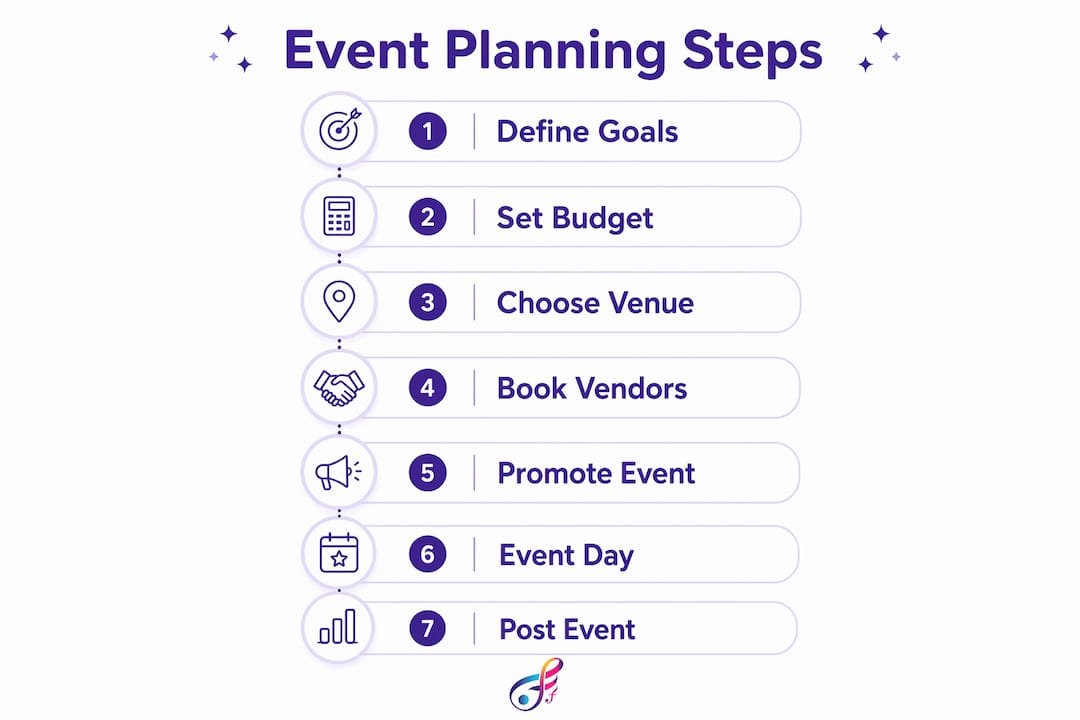
The event planning process follows a clear lifecycle, from the first idea through post-event review. Skipping any stage creates gaps that show up on the day of the event, often in front of guests. Professional event management guides break this lifecycle into seven core stages.
1. Define your objectives and audience
Start by writing down exactly what success looks like. A wedding reception has different goals than a school dance or a corporate awards dinner. Knowing your audience shapes every decision that follows, from venue size to entertainment style.
2. Set your budget with a contingency buffer
Establish the total amount available before contacting any vendor. Underbudgeting and skipping contingency are the leading causes of event planning failures. Build a 10–15% buffer into your budget from the start.
3. Select your venue and lock in the date
Venue availability often drives the event date, not the other way around. Large-scale events require starting the venue search 12 or more months ahead, while smaller gatherings need 3–6 months of lead time. Book the venue before finalizing any other vendor.

4. Book vendors and manage contracts
Entertainment, catering, photography, and lighting all require signed contracts with clear deliverables. Confirm each vendor in writing and keep copies of every agreement. Detailed contracts with explicit setup times and cancellation policies reduce disputes significantly.
5. Market and promote the event
For corporate events and ticketed gatherings, promotion starts as soon as the venue and date are confirmed. For private celebrations like weddings, this stage covers invitations, RSVPs, and guest communication.
6. Execute with a detailed event-day timeline
A run-of-show document lists every activity, transition, and responsible person by time. Share it with every vendor and team member at least one week before the event.
7. Conduct post-event evaluation
Gather feedback, review your budget against actual spending, and document what worked. This stage turns one event into a foundation for the next.
Pro Tip: Write your event objectives in one sentence before you do anything else. If you cannot summarize the event's purpose in a single sentence, your planning will lack direction from the start.
How to create an effective event planning timeline
Backward planning is the most reliable method for building an event timeline. You start with the fixed event date and work backward, assigning deadlines to each task based on how much lead time it requires. This approach removes the guesswork from scheduling and makes it obvious when you are falling behind.
Key timeline phases and milestones
- 3 or more months out: Finalize objectives, set budget, begin venue search, and identify key vendors
- 2 months out: Book venue, entertainment, catering, and photography; send invitations
- 6 weeks out: Confirm all vendor contracts, finalize guest count, and plan décor
- 2–3 weeks out: Share the run-of-show with all vendors; confirm arrival and setup times
- 1 week out: Final headcount to caterer, confirm logistics with each vendor
- Day before: Walk the venue, confirm setup schedule, and brief your team
- Event day: Execute the run-of-show; assign one person to manage vendor questions
Structured timelines that cover these seven phases reduce last-minute stress significantly. That reduction comes from having decisions made in advance rather than on the fly.
Pro Tip: Build your timeline in a shared document or app that every vendor and team member can view in real time. Centralized communication tools prevent the version-control problems that cause missed updates.
Buffer times protect your event flow
Including 15-minute buffers between major event segments prevents one delay from cascading into the next. A cocktail hour that runs long does not have to push dinner back if you planned for it. Buffers are not wasted time. They are insurance.
| Timeline phase | Recommended lead time | Buffer to include |
|---|---|---|
| Venue booking | 3–12 months | 2-week decision window |
| Vendor contracts | 2–3 months | 1-week signing buffer |
| Guest invitations | 6–8 weeks | 2-week RSVP deadline |
| Run-of-show distribution | 1–2 weeks | 3-day revision window |
| Venue setup | 24–48 hours early | 2-hour contingency block |
How to manage budgets and costs for successful events
Every event budget starts with one number: the total amount available. From there, you divide that number across categories based on your priorities. The category breakdown varies by event type, but most events allocate the largest share to venue and catering, followed by entertainment, décor, and staffing.
Typical budget allocation by category
- Venue: 25–30% of total budget
- Catering and beverages: 30–35%
- Entertainment (DJ, photo booth, lighting): 10–15%
- Décor and florals: 10–12%
- Photography and video: 8–10%
- Staffing and logistics: 5–8%
- Contingency buffer: 10–15%
The contingency buffer is non-negotiable. Peak-season venues often book 12 or more months in advance, and last-minute alternatives cost more. A buffer protects you from price surprises without derailing the entire budget.
Controlling costs without cutting quality
Track every expense in a single spreadsheet from the first deposit forward. Compare actual spending to your planned allocation weekly. When one category runs over, you need to know immediately so you can adjust another category before the overage compounds.
Vendor negotiation works best when you come prepared. Know the market rate for each service before your first call. Ask vendors about package deals, off-peak discounts, and what is included versus billed separately. Entertainment options like uplighting and photo booths are often bundled with DJ services, which reduces the total cost compared to booking each separately.
What are best practices for coordinating vendors and logistics?
Vendor coordination is where most event plans succeed or fail. A great venue and a solid budget mean nothing if vendors show up late, set up in the wrong order, or receive conflicting instructions. The solution is structure, not micromanagement.
- Get at least three quotes per vendor category. Price differences reveal market rates and give you negotiating leverage.
- Check references before signing. Ask specifically about punctuality, communication, and how the vendor handled problems.
- Use one communication channel. Email threads work for documentation. A shared group chat works for day-of updates. Never mix the two.
- Assign a single point of contact for each vendor. Multiple contacts create conflicting instructions.
- Confirm setup logistics in writing. Include load-in time, parking access, power requirements, and breakdown schedule.
- Plan for contingency. Know what you will do if a vendor cancels within 48 hours of the event.
Effective event day management starts setup 24–48 hours early, which creates a buffer for unexpected issues. Arriving early is not overcautious. It is the difference between a smooth event and a chaotic one.
Pro Tip: Build repeat relationships with vendors you trust. Repeat vendor collaborations save onboarding time and improve quality because both sides already know how the other works.
Effective event coordination relies on a communication structure where all collaborators access live, authoritative documents. A single shared folder with the run-of-show, vendor contacts, and floor plan eliminates the "I didn't get that update" problem entirely.
How do you measure event success and conduct post-event analysis?
Measuring success starts before the event, not after it. You define what success looks like during the planning stage, then build data collection into the event design itself.
- Set measurable goals early. "Guests enjoyed themselves" is not measurable. "90% of survey respondents rate the event 4 or 5 out of 5" is.
- Track registration, attendance, and engagement. These three metrics form the baseline for every event ROI calculation.
- Send post-event surveys within 24 hours. Post-event surveys should be short, focused, and sent within 24 hours to maximize response rates and data quality. Limit surveys to 5–7 questions.
- Report insights to stakeholders. Tailor the report to the audience. Executives want ROI and attendance numbers. Event teams want operational feedback.
- Benchmark for future events. Compare this event's results to previous ones. Improvement over time is the real measure of planning quality.
"Event measurement should start before the event by embedding data collection into event design. Tracking registration, attendance, and engagement metrics is the foundation for accurate ROI calculation."
Embedding measurement into event design means you collect data as a natural byproduct of running the event, not as an afterthought. That approach produces cleaner numbers and more useful insights.
Key Takeaways
Successful event planning requires treating the event as a fixed-date project, working backward through a structured timeline, and coordinating budget, vendors, and measurement from the very start.
| Point | Details |
|---|---|
| Start with a fixed date | Work backward from the event date to assign deadlines to every planning task. |
| Build a contingency buffer | Reserve 10–15% of your total budget for unexpected costs to avoid planning failures. |
| Use 15-minute segment buffers | Place buffer time between major event segments to prevent cascading delays. |
| Centralize all communication | Keep one shared document hub so every vendor accesses the same live information. |
| Measure before and after | Define measurable goals early and send post-event surveys within 24 hours for quality data. |
What I have learned after years of watching events succeed and fail
The biggest mistake I see is treating the event timeline as a rough guide rather than a binding document. Planners build a beautiful schedule, then abandon it the moment the first vendor runs five minutes late. Running late should be managed by compressing or extending segments rather than rushing guests through transitions. Rushing guests destroys the experience you spent months building.
The second mistake is underestimating how much communication matters. Visual project tracking tools like progress bars and countdowns improve team accountability and reduce the number of check-in meetings you need. When everyone can see the same progress tracker, you spend less time answering "where are we on this?" and more time actually executing.
The vendors you work with repeatedly are worth more than their price tag suggests. A DJ or photo booth company you have worked with before already knows your standards. They show up prepared, communicate proactively, and handle surprises without pulling you away from guests. That reliability is not something you can buy with a lower quote from someone new.
Events have also evolved. Hybrid formats now require parallel planning for both in-person and virtual attendees, which doubles the logistics without doubling the timeline. If your event has a virtual component, treat it as a separate production track from day one, not a feature you bolt on at the end.
The planners who consistently deliver great events are not the ones who work the hardest on event day. They are the ones who made the hard decisions three months earlier and documented everything clearly.
— Drew Deenie
Fiesta Fusion adds the entertainment layer your event needs
Planning the logistics of an event is one thing. Creating a moment guests actually remember is another. Fiesta Fusion is a veteran-owned DJ and photo booth company serving Ogden, Weber County, Davis County, and Salt Lake City, and the team specializes in the entertainment details that turn a well-organized event into a genuinely fun one.
From 360 video booth rentals that give guests an interactive experience to uplighting, wedding DJs, and quinceañera entertainment, Fiesta Fusion covers the event enhancements that most planning guides overlook. If your event is coming together and you need entertainment that fits the timeline you have built, Fiesta Fusion is ready to be part of it.
FAQ
What does the event planning process include?
The event planning process includes defining objectives, setting a budget, booking a venue, coordinating vendors, building a timeline, executing on event day, and conducting a post-event review. Each stage feeds directly into the next.
How far in advance should you start planning an event?
Large events require starting 12 or more months out, especially for venue booking during peak seasons. Smaller gatherings typically need 3–6 months of lead time to secure vendors and finalize logistics.
Why is a contingency budget important for events?
A contingency buffer of 10–15% protects against unexpected costs like vendor price changes or last-minute replacements. Underbudgeting without a buffer is one of the leading causes of event planning failures.
How do you measure whether an event was successful?
Define measurable goals before the event, track registration and attendance data during it, and send a short survey of 5–7 questions within 24 hours afterward to capture guest feedback while it is still fresh.
What is the best way to coordinate multiple vendors?
Use one centralized communication channel, assign a single point of contact for each vendor, and share a written run-of-show at least one week before the event. Confirm all logistics, including setup times and load-in access, in writing.